

It’s no secret kayaking can get expensive when it comes to accessories, gear, and travel. Kayaks are expensive and it can be heartbreaking to have scratches, cuts, dings, and gashes. I want to share with you some tips for keeping your kayak in exceptional condition. Through experience and research, I have obtained the golden rules for keeping a kayak in excellent condition.
So how do you repair a damaged kayak? First, you must walk around your kayak and make a list of concerning scratches or dings. You can fix small scratches using a wax coat, Deeper gashes need more care to repair and require you to melt polyethylene into the abrasion, and dents may require the use of a heat gun.
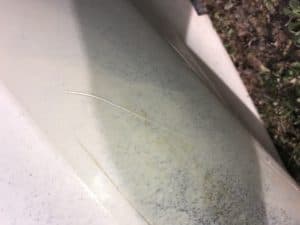
Remove Any Small Curls
Remove all small curls of plastic from scratches. These are usually from running up on a sandy beach, concrete from launch ramps, or small bumps into rocks.
Use a scraper blade (normally under 2 dollars USD) to gently cut away any curls which will cause friction and slow you down on the water, being very careful to not make any more scratches.
The goal is to just remove curls and after they are all removed, you can focus on filling them in.
Filling in Small Scratches
First, head to the store or Amazon and pick up some marine wax. After getting the wax, clean the kayak with soap and hot water, do not skip this step because the wax coating may not bond if the kayak is dirty.
Next, fill in small scratches below the waterline by applying the wax and removing any extra with a damp cloth or sponge. If you want to, you can also coat the entire hull of the kayak for prevention of future scratches.
Filling in Deeper Gouges and Gashes
For your deeper marks, you will want to pick up a marine rated gel coat (this will run you about 30 dollars USD). Begin by applying the gel coat in the deep scratches in the kayak.
Apply additional coats until the scratches are completely filled, be sure to remove the excess gel. Always wear proper safety equipment during all steps (heat resistant gloves, eye protection, breathing protection).
Use a heat gun on low heat or a blow dryer on high heat running over the gel-filled scratches until they disappear. Take extra precaution to not melt or cause any extra damage to your kayak. Allow gel to cure and bond for at least 24 hours before the next use.
Handling Dents or Deformations
To handle dents and deformations sit the kayak out in the sun for 2 to 3 hours, be sure to add support on the inside of the kayak to help push the dents out.
If this does not do the trick or if it’s cold outside use a heat gun and heat resistant gloves (such as thick leather or welding gloves) to apply heat to the outside of the kayak. Place your hand on the inside of the kayak to force the plastic back into its original shape.
Take extra care to not melt the kayak or make the problem area larger with too much heat.
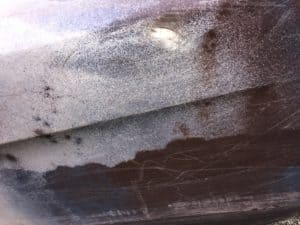
Fixing up Large Cuts
These scratches and cuts are ones too large or deep to be filled with wax or gel (cuts all the way through the hull). In cases like these it’s best to leave the repairs to the professionals, but if you don’t have the money to spare, there is an alternative. Once again, if you are not completely confident you can do this, it is best left to professionals
Step one: Gather spare plastic (preferably from other kayaks or similar plastic from which your kayak is constructed). Most kayaks are made from polyethylene
Step two: Use a melting pot or heat gun on high heat to melt the extra plastic and pack it into the scratches removing excess plastic with a putty knife. Excess plastic is good in this situation as it will form a strong bond, making sure the weld does not crack under pressure. Heat guns are generally 20 dollars at most hardware stores. Polyethylene melts around 248 – 356 degrees Fahrenheit (120 – 180 degrees Celsius). Be careful not to burn the plastic, this will ruin the plastic and make it unsuitable for repairs.
Step three: After the plastic cools and you are satisfied with the coverage you will need to sand it flush with the kayaks hull. Start with something more coarse like 300 grit sandpaper, eventually moving up to 800 or 1000 grit. Sand until smooth, making sure to not remove any original paint from the surrounding area unless you plan to repaint it. Then apply filler gel to fill in any small superficial surrounding cracks. Remember to always wear proper safety gear protecting your hands, eyes, and lungs.
Repainting Your Newly Repaired Kayak
Find the proper color matching your kayak in either a spray can or brushable paint, this may be difficult. Painting your entire hull black or any other solid color may better suit you depending on the paint job of your kayak. There is also nothing wrong with painting small patches if you don’t mind having visible patches.
The paint needs to be water resistant and able to bond to plastic (the paint will have this information written on the can). Make sure to sand the area of the kayak you want to paint with 220 grit sandpaper to allow the best bond with the plastic and the paint.
aint the area either with your spray can or paintbrush; applying at least four coats. Be sure to sand in between each coat.
Avoiding Damage in the Future
Perhaps the most important step is avoiding damage all around. You can’t stop natural wear and tear, but it is important to not speed up the process by misuse.
Take extra precaution when going down rapids or in areas where you know rocks or stumps are right below the water’s surface to avoid cuts and gashes.
Be careful docking, loading, unloading, and hauling your kayak to prevent dents and deformations. Take extra care when docking on launch ramps, sandy beaches, and rocky shores to avoid minor scratches.
Improperly storing your kayak can also cause issues due to heat and weather exposure.
Kayaks are expensive, be sure to take good care of yours so it will last as long as possible!