

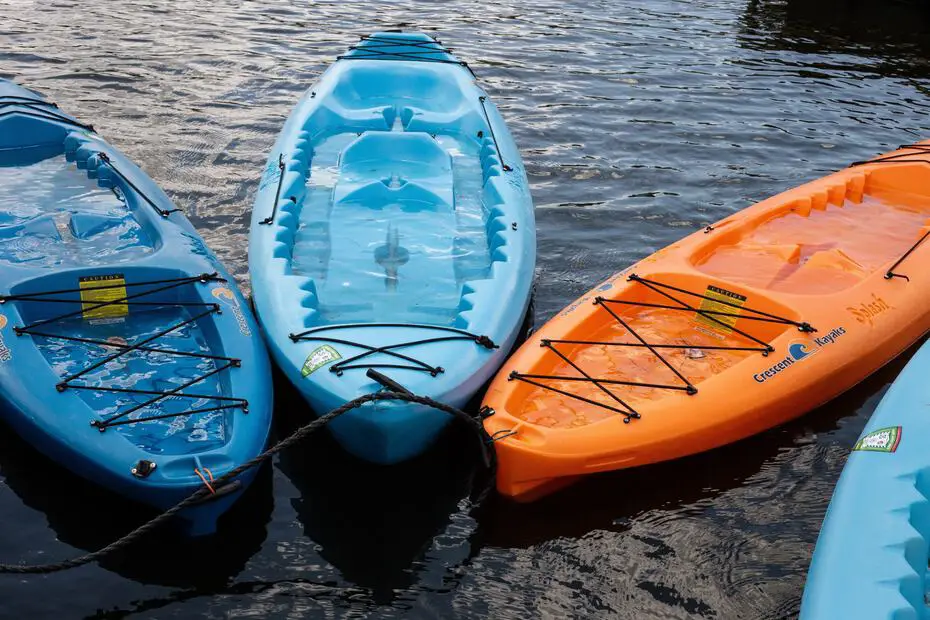
I was introduced to conventional kayaking around the age of 16. I remember like it was yesterday, watching my intoxicated aunt climb into a sit-in style kayak and paddle her way off of a dock, nose first, into the water. Obviously, the kayak went straight down and she came back up swimming. Luckily she wasn’t hurt and the kayak stayed afloat, but I would be lying if that didn’t intimidate me to get into a sit-in kayak for the first time. I wanted to learn just what it took to sink a kayak just in case I was ever faced with the situation, and that is where I found the virtually unsinkable sit-on-top kayak.
Can a sit-on-top kayak sink? Luckily, Sit-on-top (SOT) kayaks are nearly unsinkable under normal circumstances. The most common way to cause your sit-on-top kayak to sink is to ignore the weight limit of the vessel. Even then your kayak will stay mostly afloat, but will not allow you to ride it. A sit-on-top kayak should never truly sink.
Let’s explore all the possibilities and ensure that your sit-on-top kayak stays above water where it belongs.
Sinking vs become swamped
The term ‘swamped’ is a common word used amongst kayaks which means “to become filled with water, submerged, or to be overwhelmed”. So while a sit-on-top technically will not sink, it can become swamped, or simply put, overwhelmed with water or barely submerged.
The benefit here is that a swamped sit-on-top kayak can usually be bailed and remounted quicker than a sinking sit-in kayak.
Staying under the kayaks load capacity
The weight limit of kayak detail the absolute max weight the vessel can handle and remain above water. You should aim for anywhere between ½ and ¾ of the max weight, including all of your gear. Trying to stay between 50 and 75 percent of the max weight of your kayak will ensure that it is not only able to stay above water but easier to paddle and less likely to flip as well.
Taking a huge amount of damage
The fastest way to sink your kayak would be to completely break it in half. Punctures in the hull bangs against sharp rocks, or cracked scupper holes will all cause you to begin taking on water relatively quickly. Fortunately, the majority of name brand kayaks are made of polyethylene instead of cheaper plastic, which makes them more durable to punishment. These more expensive kayaks are also designed and molded with sealed off air pockets in the hull allowing the kayak to be punctured while only taking on small amounts of water opposed to filling entire hull.
Inspect your kayak before every trip and take note of worrisome dents, scratches or gashes. It is best to repair these blemishes when you notice them so they don’t have the opportunity to become worse and cause problems later. You can read more on repairing a damaged kayak here: LINK
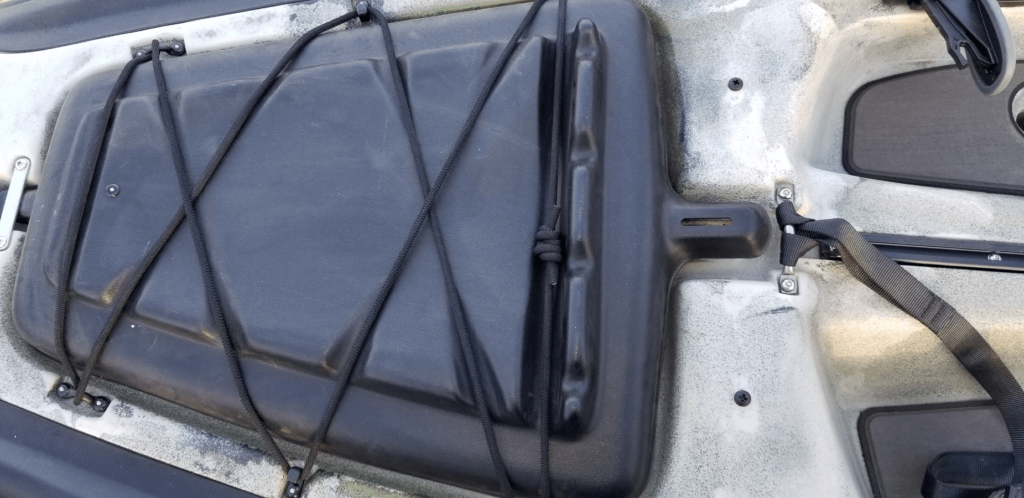
Be aware of your storage hatches
The easiest and most common way to cause a sit-on-top kayak to sink is to leave your storage hatches open, allowing them to take on water. While not all sit-on-top kayaks feature storage hatches, the ones that do generally have no way to drain them.
Generally, a kayaker will leave his storage hatch open for convenience, not thinking about the possibility that he could potentially flip, and if he does, his storage compartment will fill with water. I have seen people flip their kayaks panicking over contact with a spider before. Even in situations where you feel safe, keep those storage hatches closed if you are not actively using it. Other times the kayaker opens the hatch at an inappropriate time, for example; before engaging rapids and water floods them with the hatch wide open. Always make sure your hatches are secure after closing them and carry a bilge pump or cup for baling water. Some kayakers go as far as to coat their seals with vaseline for a little added security, I find this a little excessive. A small amount of water in your storage hatch is normal, as long as the water level doesn’t continually rise even when the hatch is closed.
Make sure your drain plug is in and secure
The drain plug can become loose or removed completely and will cause the kayak’s hull to take on water very quickly. Some kayaks even have a drain hole that is below the water line. It is always a good rule of thumb to inspect your kayak before putting it in the water, the drain plug should be included in the checklist.
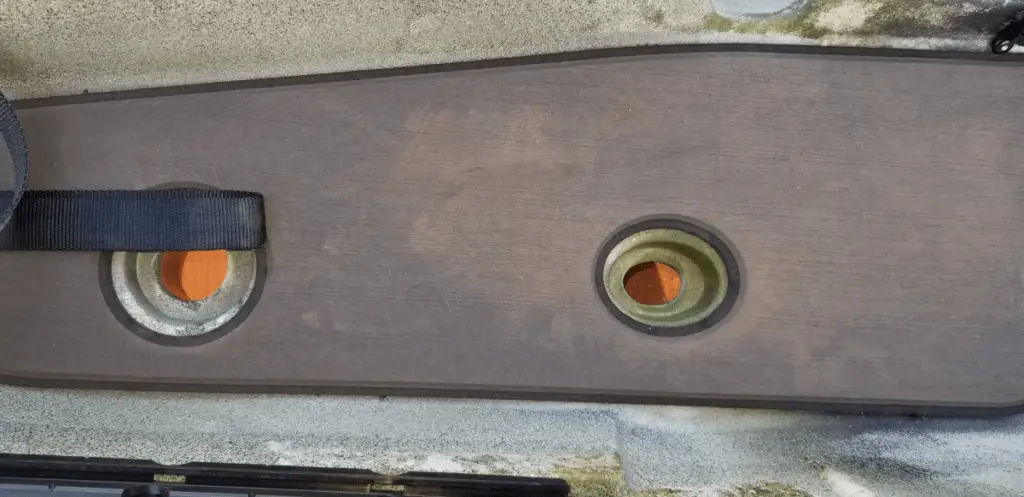
Leave at least a few scupper holes unplugged
While scupper holes can become annoying to some kayakers because they allow water to splash in from under the kayak, they are best left unplugged. The purpose of a scupper hole is to drain water from the deck of a sit-on-top kayak, so plugging them prevents them from working as intended. Depending on your preference or the situation, you may opt to plug some of your scupper holes or purchase scupper plugs with a valve that allows water to only exit the kayak. If for some reason you want to plug all of your scupper holes you can use a bilge pump or bail the water out manually.
Adding extra buoyancy
Some kayakers choose to put a couple of pool noodles or float bags in the storage compartments or on top of the kayak to add a little more buoyancy, others use an inflatable outrigger, which also increases stability.
Instability is a warning sign
If you slowly realize that your kayak has become increasingly unstable over the past half hour or so then you may want to hurry to shore and inspect your kayak. Your kayak becoming gradually unstable is the best way to tell that your sit-on-top kayak is taking on water, generally through the drain hole or a puncture in the hull.
You may not be able to sink a SOT but you can flip them
Most sit-on-top kayaks have an elevated chair, which in turn raises your center of gravity. A raised center of gravity makes it easy to capsize the kayak when reaching over the side or making swift movements toward one side.
Fortunately, sit-on-top kayaks are extremely easy to re-enter from the water as other vessels would be more difficult.
Even though you cannot sink a sit-on-top kayak, you will flip one at some point; especially in a river. Tether anything you’re not willing to lose to the kayak and always be ready to go for a swim. If you are unable to swim, I suggest you read the non-swimmers guide to kayaking.